In this article, I introduce the workflow to create a shader and upload it to STYLY, by Amplify Shader Editor.
Amplify Shader Editor is a tool to create a shader without coding. With Amplify Shader Editor, you can create a Material with a new shader effect by connecting the Nodes, and can apply it to the model in Unity.
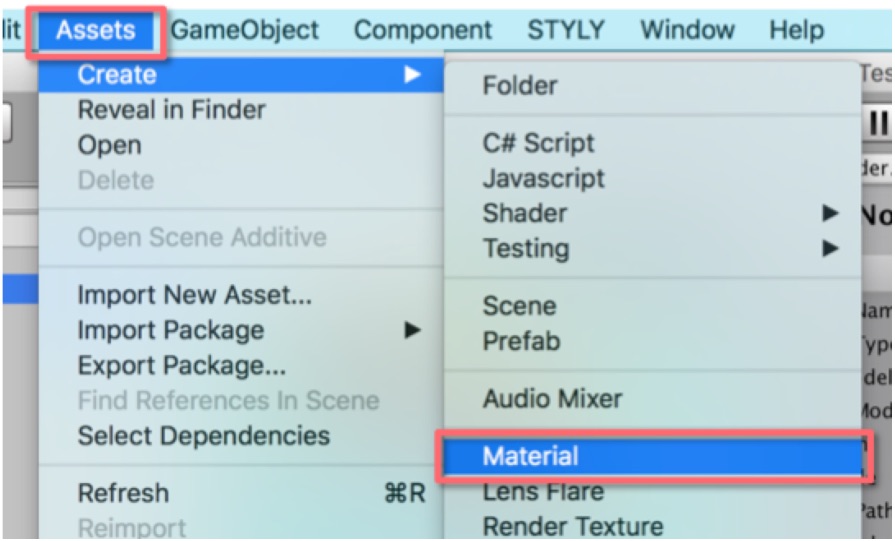
Click Assets>Create>Material to create a Material.

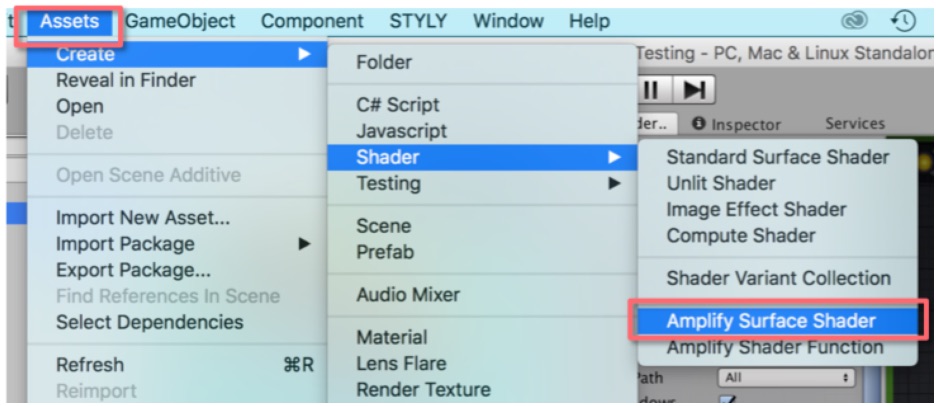
Click Assets>Create>Shader>Amplify Surface Shader to create an Amplify Surface Shader.
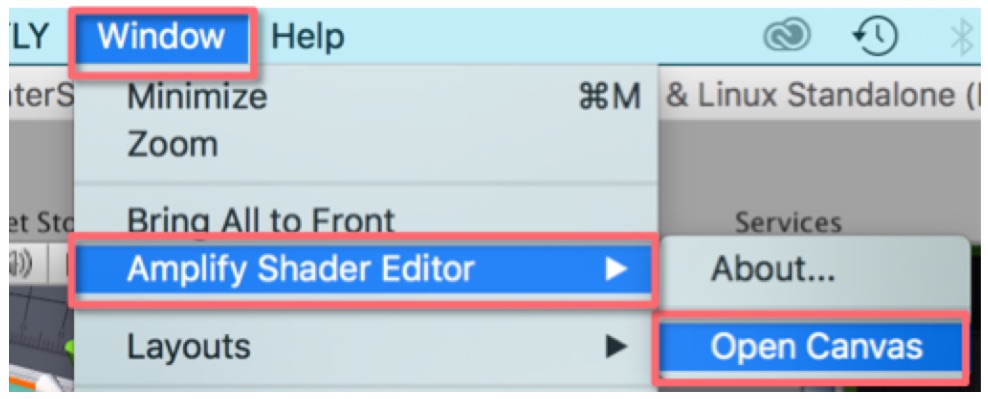
Select Window> Amplify Shader Editor> Open Canvas to open the Amplify Shader Editor window. You can also open the editor by double-clicking an ‘Amplify Shader Editor’ Material or an ‘Amplify Shader Editor’ Shader.
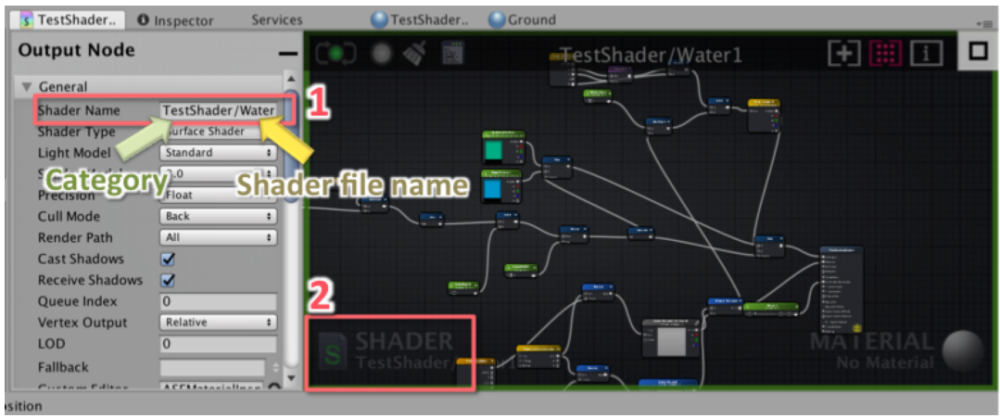
You can change the name of the Shader by the Shader Name box (‘1’ in the screenshot above) and also add your own category by using a forward slash (/). A Shader can use different names for actual shader and the file.
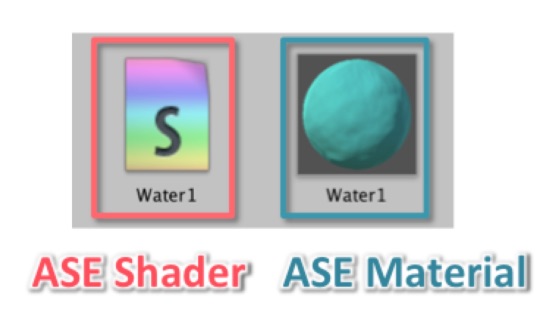
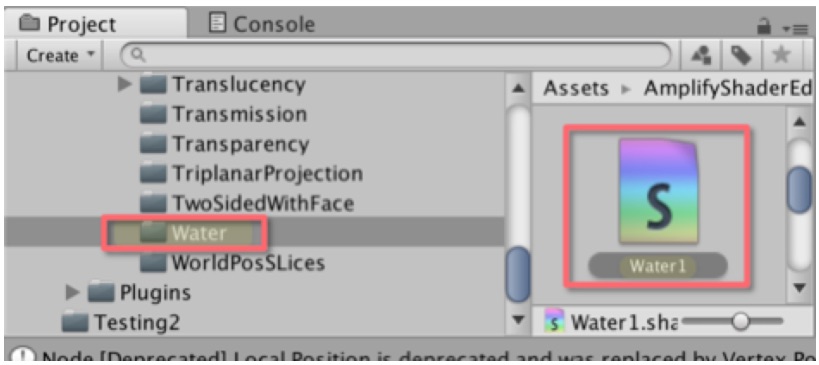
Press the icon shown as ‘2’ in the screenshot above to find where the shader file is in the Project Explore tab. The green outline tells that the Shader is currently open.
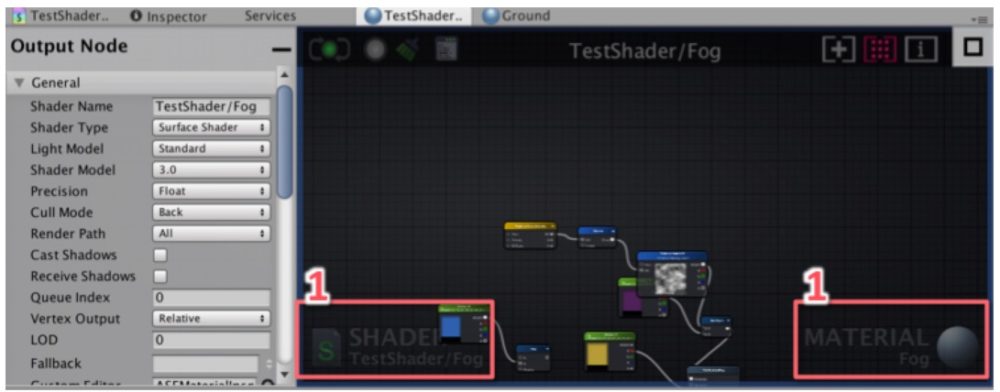
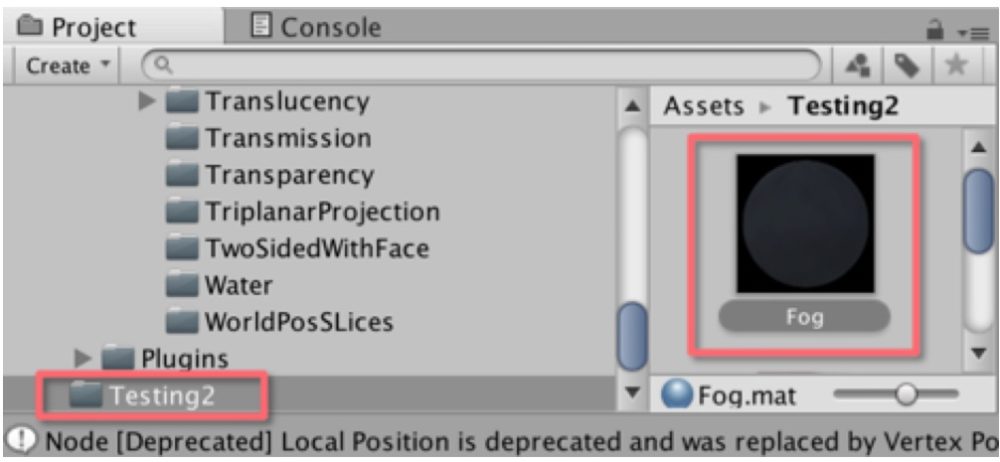
Click the Material to open the editor, and then click ‘1’ shown in the screenshot above to find where the shader file is in the Project Explorer tab. The blue outline tells that both the Material and Shader are currently open.
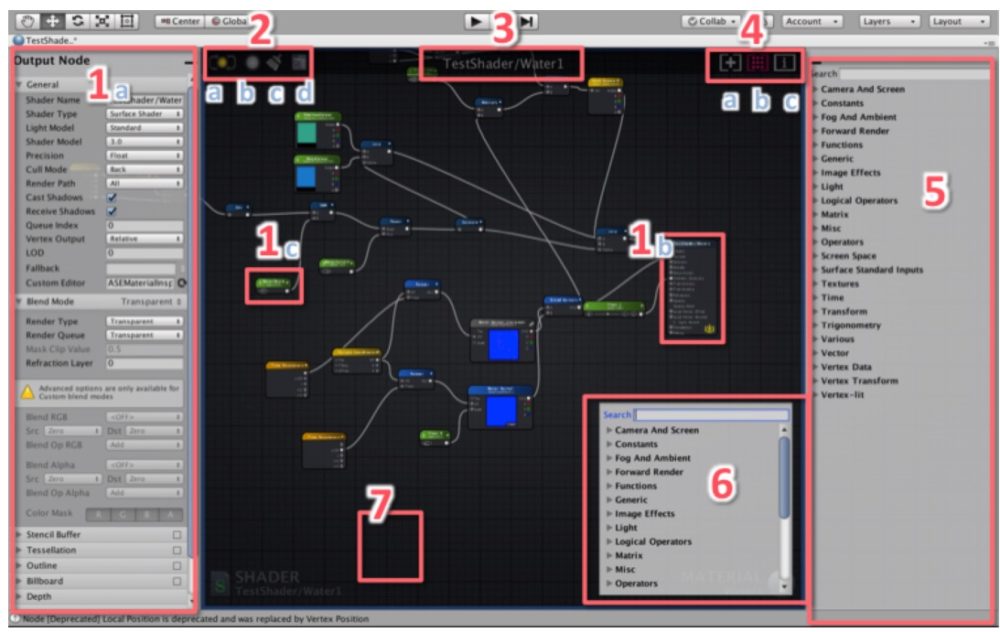
With a Node(1c) or the Output Node(1b) selected, you can change the property of the Node by the tab on the left(1a). If nothing is selected, the Output Node Property tab is shown automatically. If you want to minimize the Output Node Property tab, click the minus button in the upper right corner of the tab.
a) Save button – You save and update Shader manually.
b) Live Update button – When activated, Shader is updated automatically.
c) Clear button – It removes all disconnected Nodes.
d) Edit button – It opens the script of Shader in Text Editor.
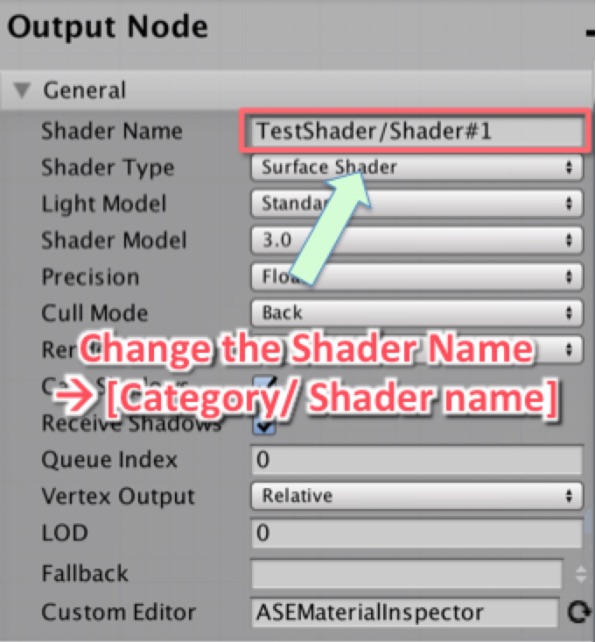
Shader category and name with the format, (shader category) / (shader name).
a) Focus on the Output Node
b) Focus on the selected Nodes. Double pressing the ‘F’ key does the same. If nothing is selected, it will focus on the entire node collection.
This is the Node Palette tab where you can find and drag out Nodes onto the canvas area. You can minimize the Node Palette tab by clicking the minus button in the upper left corner of the tab.
Right-click anywhere on the canvas to bring up a searchable node list.
Hold a shortcut key (Refer to the numbers shown in the Node Palette tab) and click anywhere on the canvas to create a new node. The ‘m’ key is to copy a node.
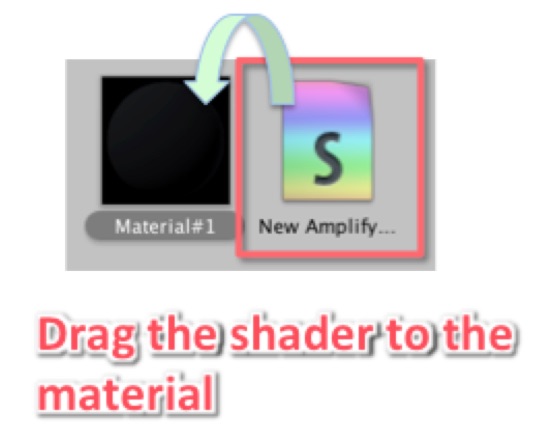
You need to create a Material and Amplify Surface Shader before making a Shader (Refer to Introduction). Then, drag the Amplify Shader onto ‘Material#1″. You can also assign the Material to an object.
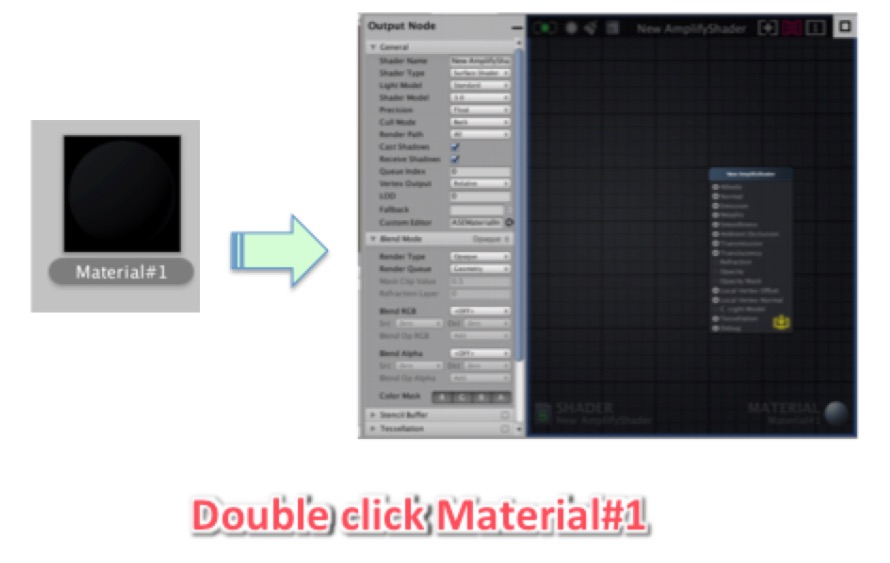
Double-click Material#1 to open the editor.
Change the Shader Name in the Output Node tab on the left.
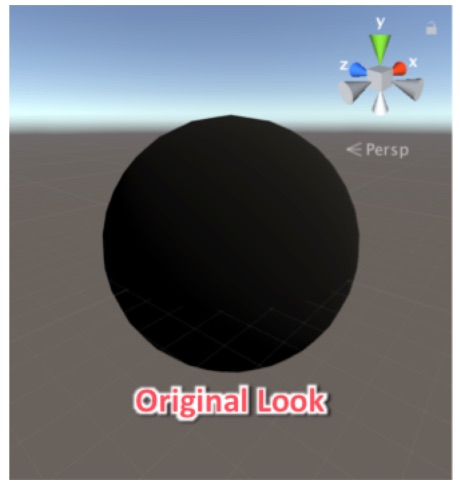
The initial appearance of a sphere is shown below.
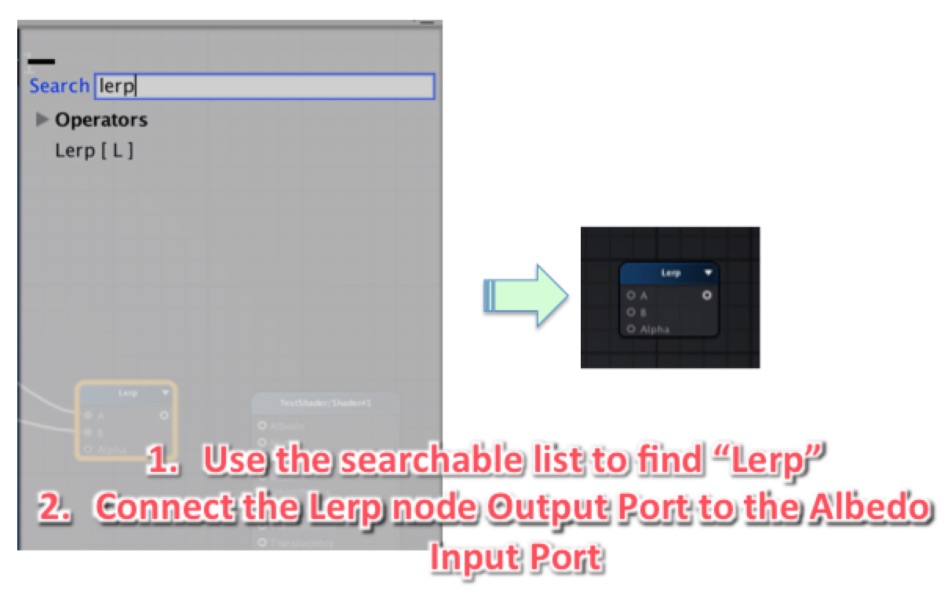
Firstly, find ‘Lerp’ by the searchable list and then connect the Lerp node Output Port to the Albedo Input Port.
Next, with the shortcut key, ‘5’, held down, right-click a blank space in the canvas to create a new Colour node. Then, Connect the Color Output Port to the Lerp Input Port.
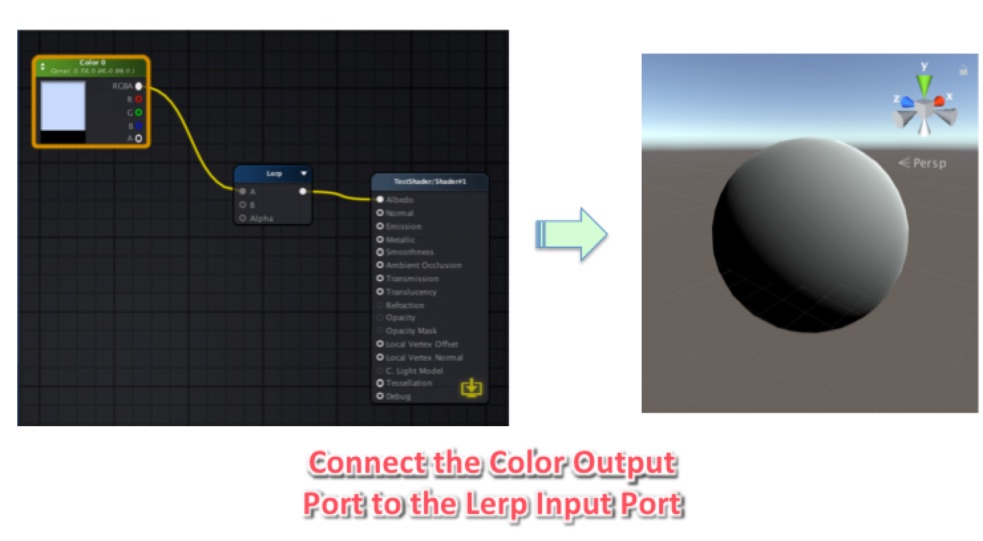
Press Ctrl (Command key for Mac) and the ‘D’ key to copy, and add another Colour node. Add a Float Node and connect those Nodes to the ‘Lerp’ Node.
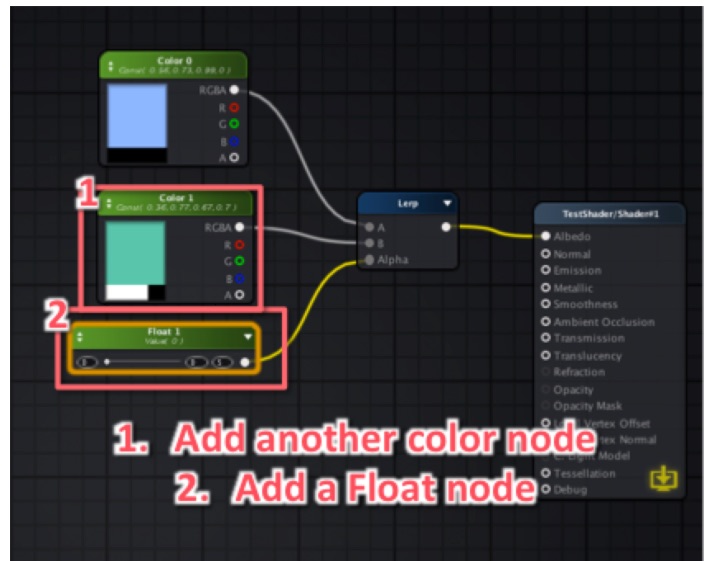
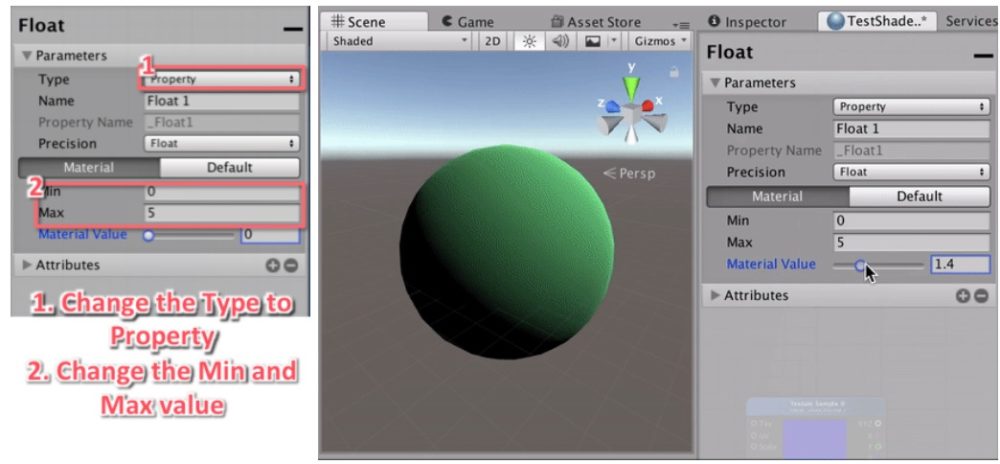
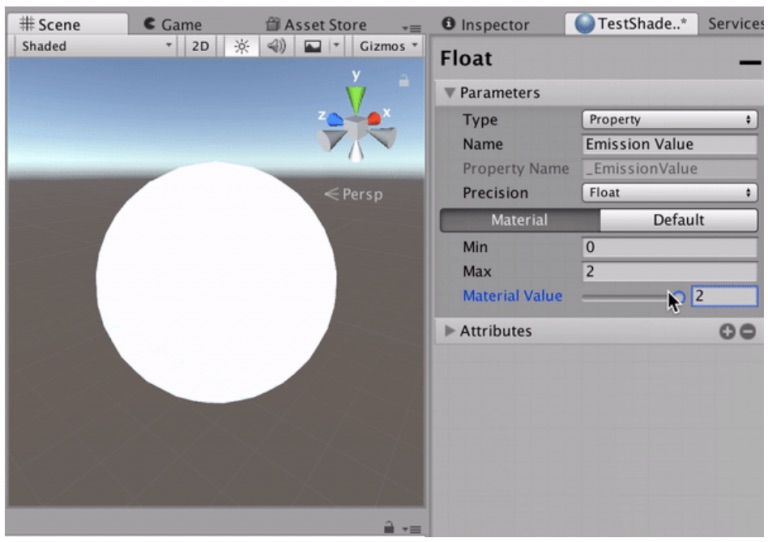
Now, we change the parameters of the Float Node. Firstly, change the Type to ‘Property’, which enable to change them in the Material directly. Next, change the Min and Max value.
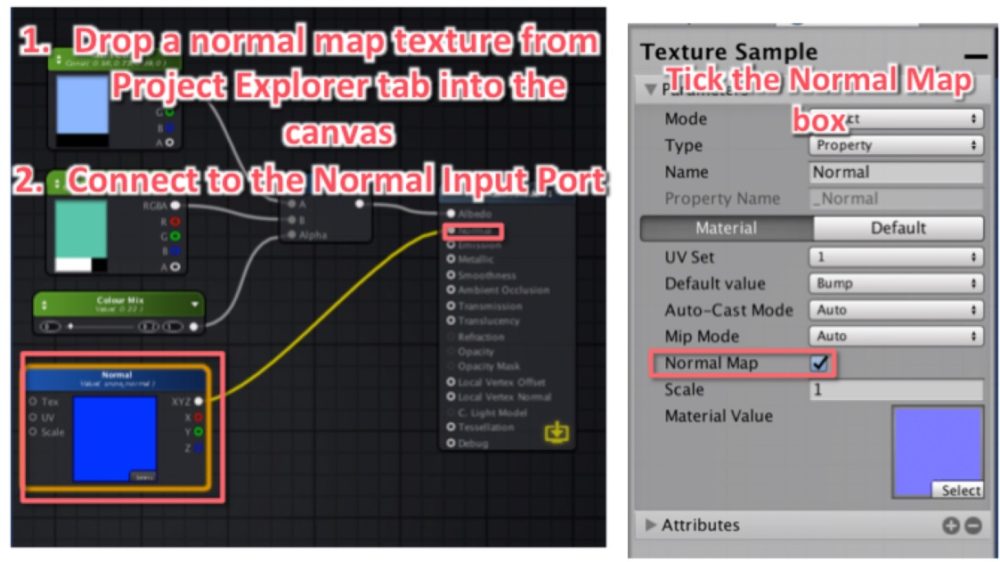
To assign a texture to the model, drop a Normal Map texture from Project Explorer tab into the canvas and connect it to the Normal Input Port. Make sure you checked the ‘Normal Map’ box.
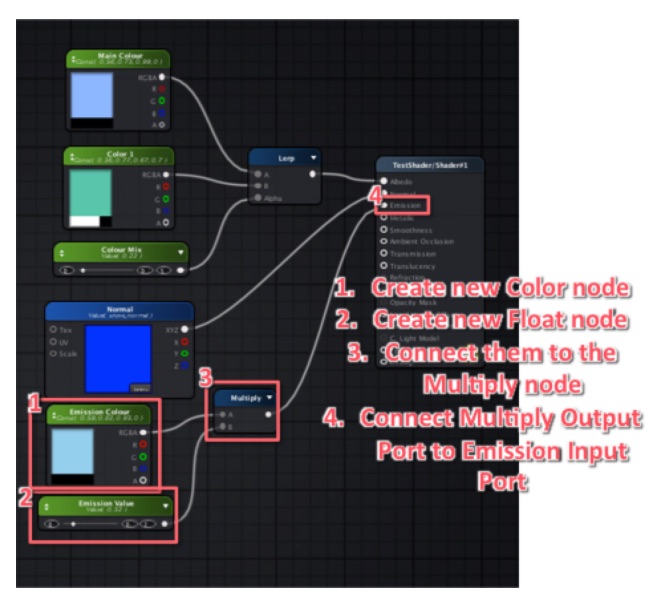
To make an Emission effect, create a new Color Node and Float Node and connect their Output Ports to the Multiply Input Port. Next, connect the Multiply Output Port to the Emission Input Port.
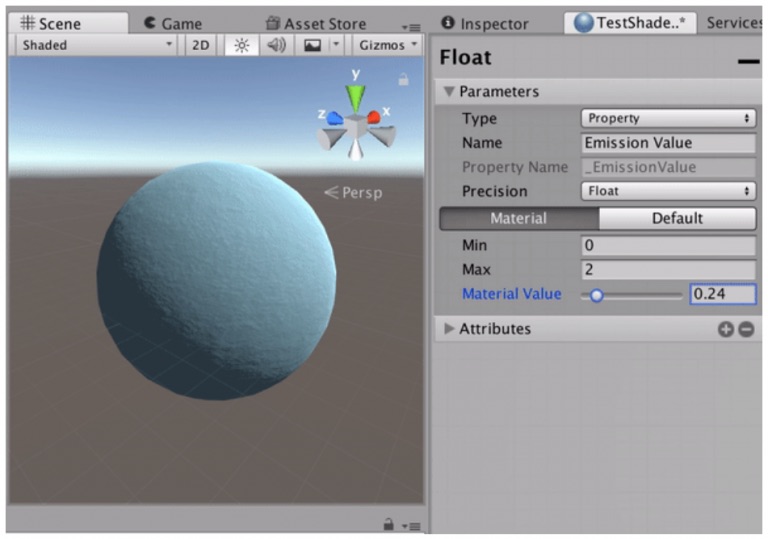
Finally, change the Type to ‘Property’ to enable to change the parameter in the Material directly.
Now it’s ready to upload to STYLY!
Let’s learn how to upload an Amplify Shader GameObject to STYLY.
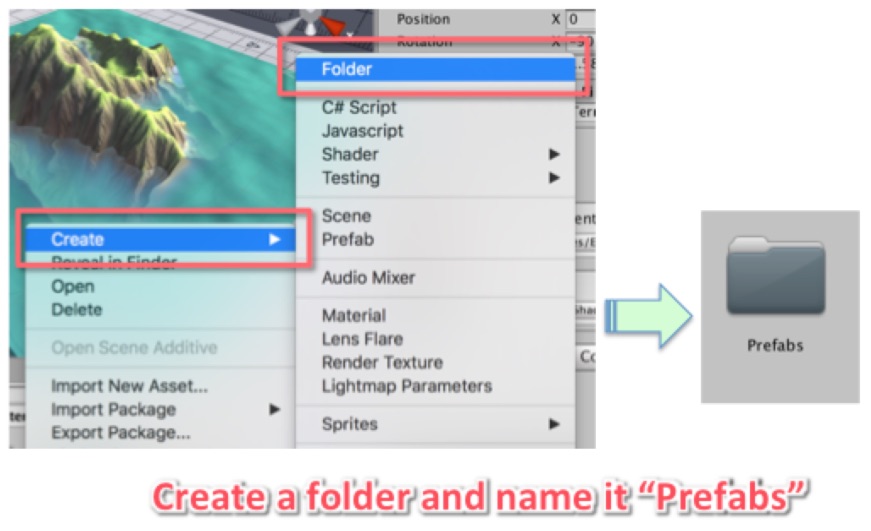
Firstly, create a folder below the ‘Assets’ folder and name it ‘Prefabs’.
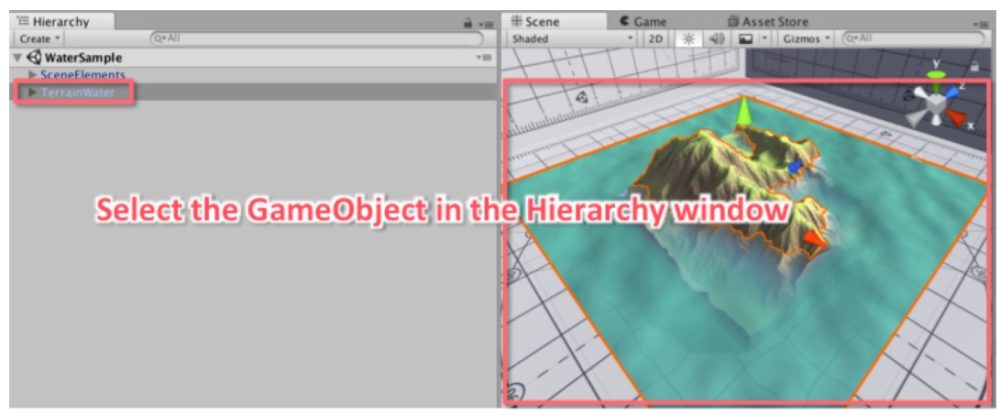
Next, select the GameObject to upload in the Hierarchy window on the left.
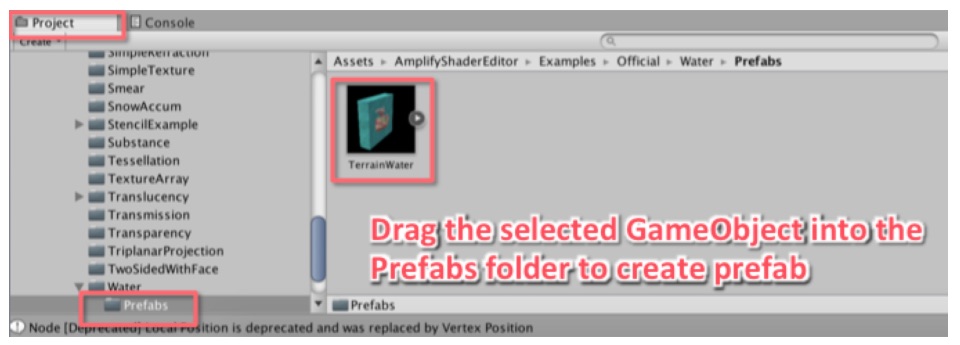
Drag the selected GameObject into the Prefabs folder just created to make a Prefab.
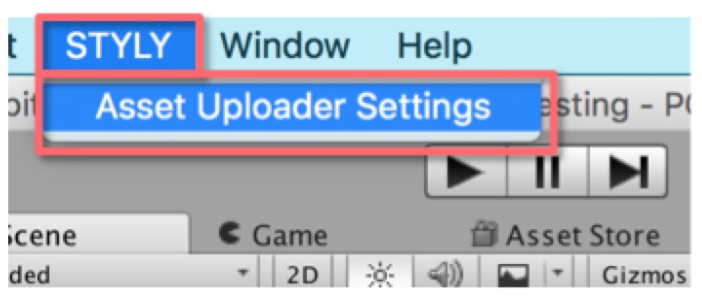
Once the Prefab is made, go to STYLY > Asset Uploader Settings.
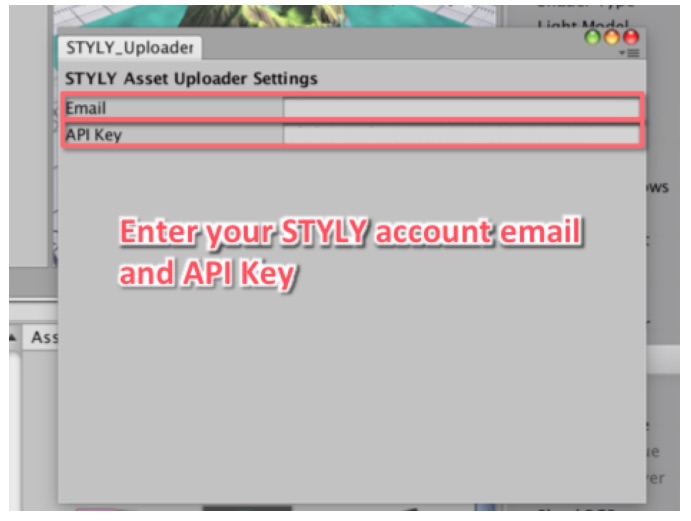
Enter your STYLY account e-mail address and API key.
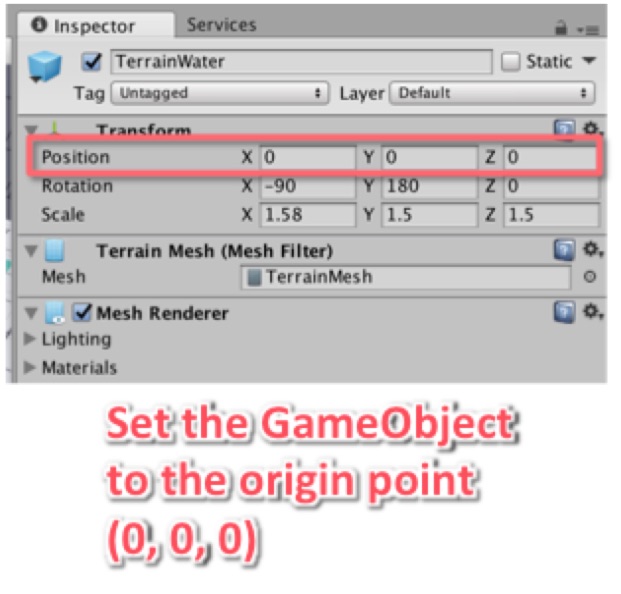
Before uploading the Prefab, set its position to (0, 0, 0).
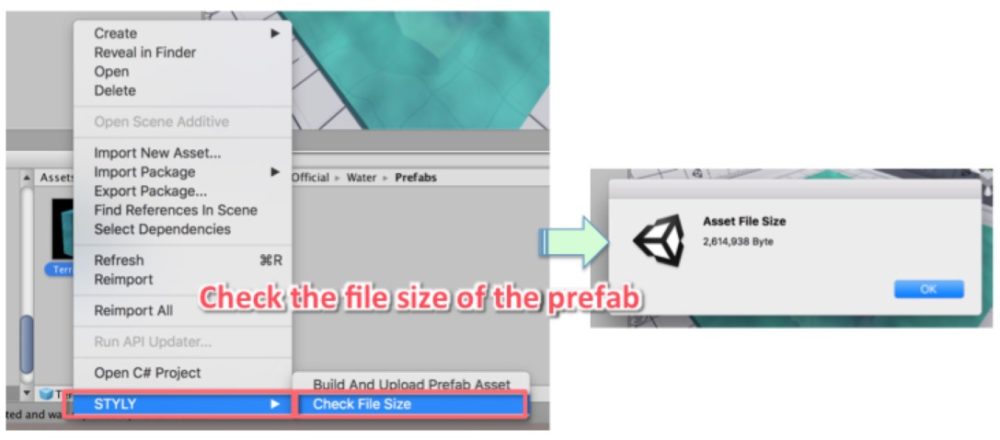
Right-click the Prefab you want to upload and go to STYLY > Check File Size in the drop-down menu to check the file size of the Prefab. Less than 3MB is recommended for the file size of a Prefab.
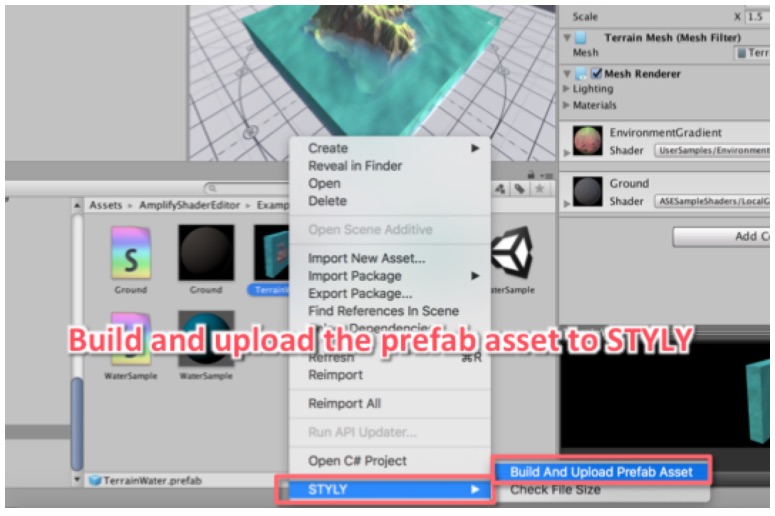
Right-click the Prefab you want to upload and go to STYLY > Build And Upload Prefab Asset in the drop-down menu to start uploading.
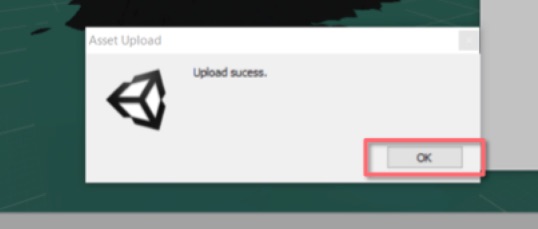
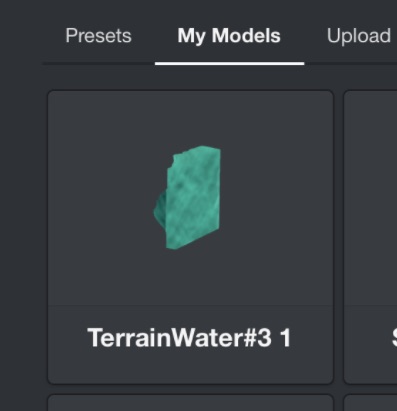
Click OK when the upload is completed. Now, the asset is available in STYLY.
After graduating from Digital Hollywood, it is active as a freelance video creator. Shooting, editing, lighter, lighter, lighter, English translation, etc. also active in video editing. I like space and reading.
Based on the VR/AR production and distribution platform STYLY, you will learn the basics of Unity and PlayMaker necessary for creating VR/AR content, as well as the process of creating the compelling content being distributed on STYLY (we'll expose you to the production techniques).